 FREE AI BRANDING TRAINING On APril 29 - SAVE YOUR SEAT!
 Are your blog graphics….meh? I know, blog graphic design is something that can haunt even the most skilled blogger.
You have the perfect post with the right keywords and smashing content, and now you need the images to go with it. Believe it or not, visual content is just as important as written content. If you want your stuff to stand out online, you need to make sure your blog graphic design skills are on point.
Humans are drawn to anything visual by nature. It doesn’t matter how good your content is, if you don’t have eye-catching graphics to go with it, you’re going to have trouble standing out and making a statement.
When you can design your own blog graphics, the online world is your oyster and so many doors open up. This is one of the most overlooked skills when it comes to blogging. Take your visual content seriously, and you will stand out from the crowd and show the world the professional that you are.
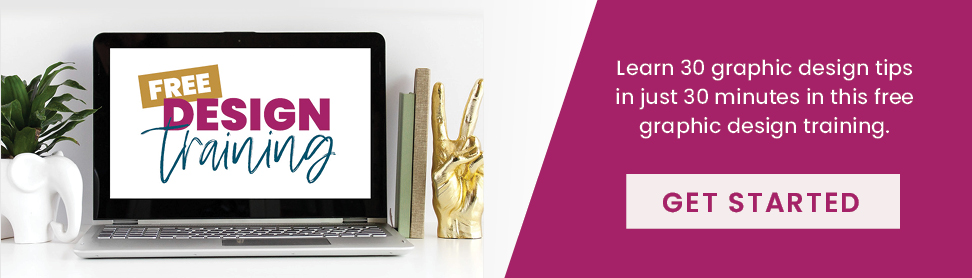
If you’re ready to learn some basic design, enroll in my Free 30-Minute Graphic Design Traning to learn some great design tips for creating your opt-in freebie. YES, it’s only 30 minutes (cause I know you’re busy!) but you are going to learn SO much! You’ll also get a very brief introduction to six super important graphic design principles that will improve your graphics when you use them.
Alright, let’s jump in!
Mistake #1: Not Enough Contrast
You want your images to POP, right? Failing to understand contrast could be the difference between a successful image and complete flop. Using images, text and other elements that blend in too much with each other will make your images lack in the dazzle department. Often, I see pins that make my skin crawl because they take work to read. This is unnecessary friction that you don’t need to come between you and your readers.

PRO-TIP: When in doubt, use white space. Most professional designers will tell you that this is one of the most commonly overlooked design elements. Integrating white space into your blog graphics, .pdfs, opt-ins and any other blog assets you create will help guide people through your designs, directly to what you want them to see or take action on.
Mistake #2: No Visual Hierarchy
One of my favorite graphic design mottos is, “When everything is special, nothing is special.” If a retail store had every single one of their products on sale all the time, is there anything special about a particular sale item? You can put this same concept to use when you are designing your blog graphics. There should always be one focal point of your blog graphic that you want your readers to notice right away. Without visual hierarchy, your readers won’t know where to look or what you’re trying to convey. It’s your job to direct them.
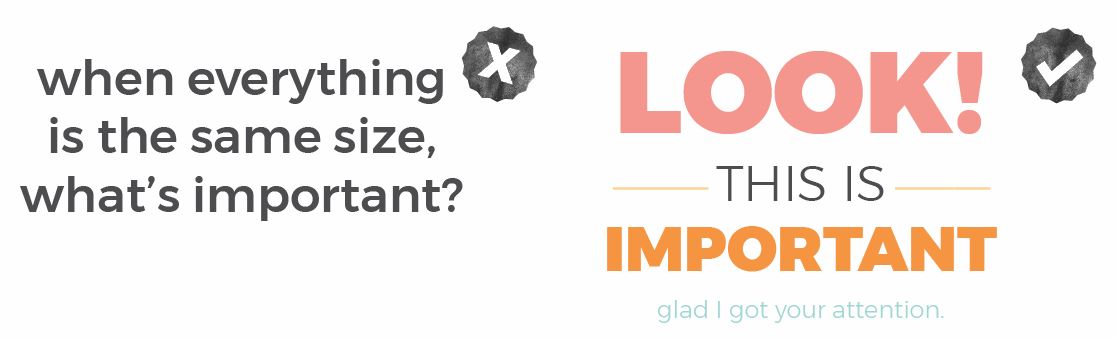
PRO-TIP: There are a few ways to ensure your blog designs make proper use of hierarchy:
- Utilize size. The largest elements will always get the most attention.
- Use color and contrast. Pick a dominating color to direct your readers. Why do you think stop signs are red?
- Choose an eye-catching font. Add some personality and interest to a few critical words.
Mistake #3: Bad Use of Design Effects
Just because there are options like drop shadows, outer glows, and 3d effects in your design program of choice doesn’t mean you should use them. In fact, if you can design great blog images and graphics without these effects, you’re on your way to designing like a pro and mastering blog graphic design!

PRO-TIP: Instead of putting a band-aid on a design challenge, find a workable solution. Instead of using that ugly drop shadow so your text can be seen in the image you’re using, choose a different image, try a color overlay or fade the image out with a gradient. All of these choices are 110% better than a drop shadow or other dated effect.
Mistake #4: Distorting Fonts or Images
This is one of the most straightforward graphic design rules you will always want to follow. Never, ever, EVER stretch any photo, text or another visual element. If you need to make something taller, wider, more narrow or shorter – distortion is not the answer! This could very well be the number one thing that will make your designs look unprofessional. I talk more about font mistakes here.
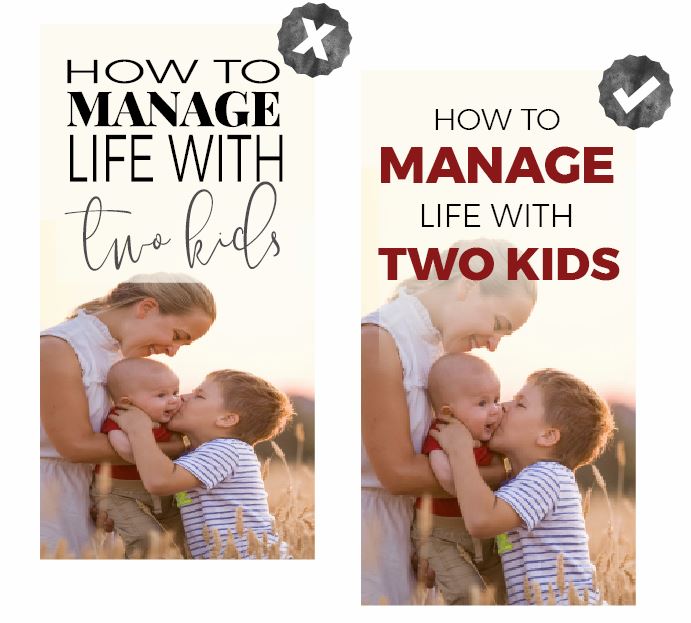
PRO-TIP: If you’re struggling to make your fonts or images work in the space you have available without the urge to stretch a font to fill a space to squish a picture to make more room for copy, it might be a good idea to start over. Look around for some different inspiration, play around with various fonts, but don’t get too carried away! Just make a fantastic and attractive blog image!
Mistake #5: Not Using a Spell Checking Tool
This one isn’t a true blog graphic design mistake, but it has the potential to 100% ruin any of your hard-worked designs. Imagine publishing a perfect article with blog images that are on point and Pinterest pins that will make people stop in their tracks only to discover months later that there’s a big. fat. TYPO in one of your images. It has happened to me and let me tell you: this is every Graphic Designer’s nightmare! The pins below have some significant spelling errors, and you would never want to have that circulating on Pinterest making you look like an amateur!

PRO-TIP: I rely 100% on my favorite online spell checking tool, Grammarly. I always tell people that although I’m a skilled graphic designer, I am a terrible spell checker! There is a free version available, and there’s even a Google Chrome extension that checks your work as you type on ANY webpage, including the WordPress editor! I never publish anything without running my text through this life-saving tool.
So there you have it! Five blog graphic design mistakes that you never want to make! Here’s to designing better blog graphics and visual content!
I can’t wait to see what you create!

Great tips! As someone who doesn’t have a good visual eye, these are great reminders and I really appreciate the examples. Helps to see good vs bad side by side.
Glad to help, Heather!
I do need the free course to design my own graphics! I do try and I use even the paid version of Canva but I still think several things are missing. Signing up so make space for me! I’m also sharing for the benefit of others.
Thanks for sharing! Hope the mini course helped!
Experience the best Galveston Shuttle Service with our premier Galveston Shuttle Transportation service. Our Houston to Galveston shuttle service and Galveston to Houston shuttle service ensure timely and comfortable travel for your convenience.
Houston Airport Shuttle offers dependable Houston VIP Shuttle services for both IAH and Hobby airports. With convenient home pickups, their Houston Shuttle Service ensures smooth and efficient transportation, including round trips and a free shuttle from IAH to Hobby.
Choose our airport shuttle from Houston to Galveston for a stress-free ride. We provide shuttles from Hobby Airport to Galveston, and shuttle services from George Bush Airport to Galveston hotels, ensuring prompt and comfortable transportation for all your travel needs.
Travel effortlessly with our Galveston Cruise Shuttle from Houston. We offer reliable transportation to the Galveston Cruise Terminal from Hobby and George Bush Airports, Downtown Houston, and nearby areas like Katy and Sugar Land. Secure your shuttle today for a stress-free journey!
Offering multiple transportation choices, Houston to Galveston shuttles include private car, luxury options, and group services. Passengers can opt for black car, corporate, or express VIP shuttles, as well as cruise transfers, all designed to meet special event and airport travel needs.
VIP Sprinter Service Houston to Galveston ensures first-class travel with top-tier amenities. Whether for airport transfers, corporate events, or weddings, experience ultimate luxury and comfort with a private VIP sprinter van rental.
Whether you need a transfer from Galveston Seawall to Hobby Airport or a ride from Galveston Port to Hobby Airport, we offer top-notch, affordable transportation from Hobby Airport to Galveston Beach with options to fit all your travel needs.
Houston to Galveston 10-Passenger Van Services is great for mid-size groups. Our Sprinter Van Services Houston to Galveston offers a stylish ride. Choose Houston to Galveston Cruise Van Services for seamless port transfers. Enjoy executive comfort with Corporate Van Services Houston to Galveston.
Van Services Houston to Galveston ensures a seamless journey. Our Houston to Galveston Cruise Van Services guarantees smooth port transfers. Book Houston to Galveston Private Group Van Services for customized rides. Choose Houston to Galveston Charter Van Services for exclusive transport.
Houston Shuttle Service offers efficient transportation solutions tailored to your schedule. Our Shuttle Service Houston provides convenient airport and event transfers. We specialize in Shuttle Services in Houston Texas and trusted Transportation Services Houston with professional drivers and comfortable vehicles.