 FREE AI BRANDING TRAINING On APril 29 - SAVE YOUR SEAT!
The featured image of your blog post or WordPress page plays a crazy important role in the share-ability (is that a word?!) of your content.
But if you’re not a designer, you’re probably feeling a bit overwhelmed at the thought of having to create one, HOW to create one, and how to actually make it look good. (If your graphics look unprofessional, what will people think about your content?!)
In this video, I’m sharing with you step-by-step how to create some amazing featured images for your blog posts and pages – give it a watch!👇
Here’s What You’re going to learn:
- The purpose of a featured image
- How they can help your content go further on social media
- Design tips for creating featured images
- Why you should start with a template
- How to upload it to your WordPress website and insert it into your post
What is a Featured Image?
A featured image is the visual representation of your content, and it can do amazing things for your reach! The most effective featured images are a magical combination of one part relevant image and one part text. When done right, they will grab your viewer’s attention and get them interested in your content.
- These images show up in a few places:
- Your blog roll feed page (www.yoururl.com/blog)
- With the link you share on social media (think Facebook)
- In a related posts section on your website
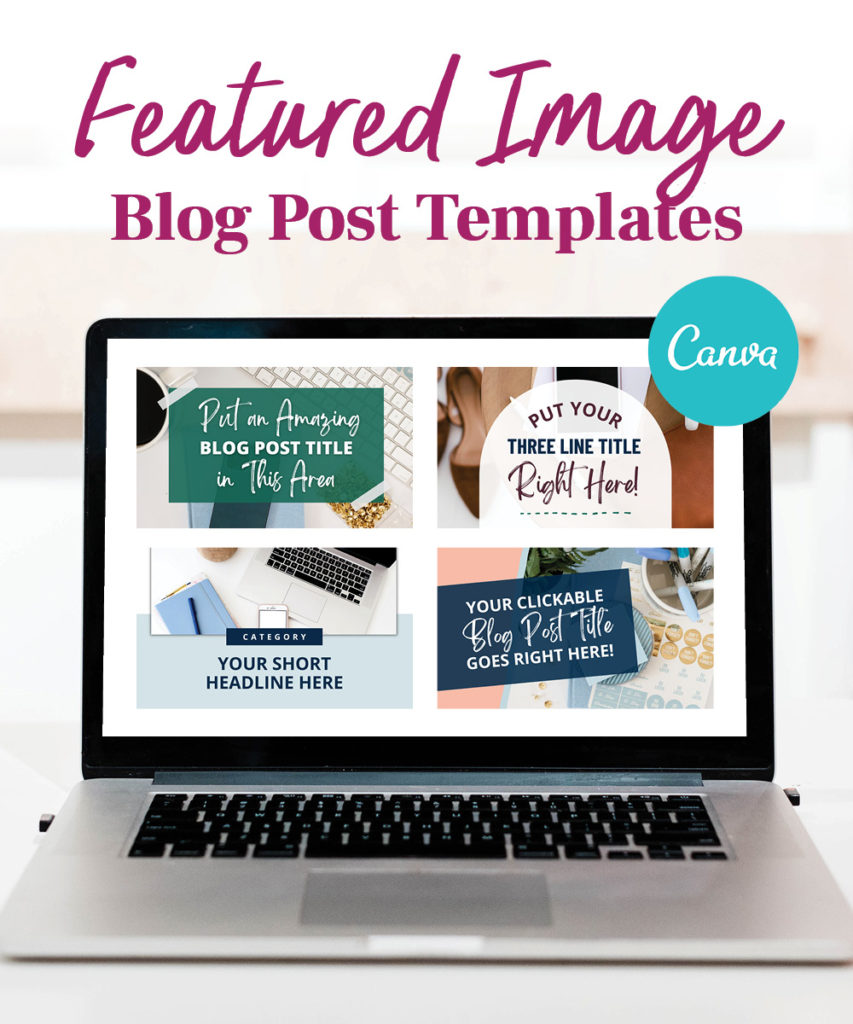
Featured Image Templates
If you want to hop on the fast track and save yourself tons of time creating some amazing featured images for your website pages and blog psots- I’ve got a set of Canva templates with your name on it!
The bundle comes with 30 different plug-and-play templates ready for you to customize!
What Size Should a Featured Image be?
The size of your featured image will vary based on which WordPress theme you are using. Different themes may have different sizes, but you can start with 1200 x 700 pixels. This is a standard horizontal size that will display nicely across most WordPress themes.
Here is a great article on understanding featured image sizes in WordPress if you want to learn more.
What’s the Best Software for Creating Featured Images?
Without hesitation, Canva is by far the best tool for creating featured images (and any other graphics you’ll ever need!). It’s easy to learn and very intuitive. You can create some really nice-looking graphcis without having any design skills.
There is a free version and a pro version. You can try out Canva Pro FREE for 30 days through this link.
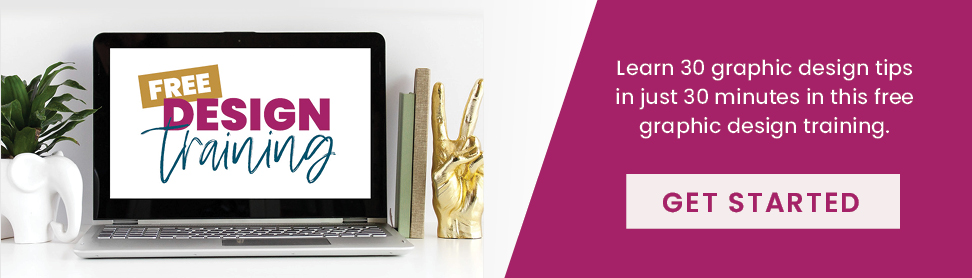
Free Graphic Design Training
If you’re ready to learn some basic design, enroll in my Free 30-Minute Graphic Design Traning to learn some great design tips for creating your featured images and other visual content. YES, it’s only 30 minutes (cause I know you’re busy!) but you are going to learn SO much! You’ll also get a very brief introduction to six super important graphic design principles that will improve your graphics when you use them.
Alright, so let’s dig into some Featured Image Layouts that you can use for your own content!
Blog Featured Image Layout #1
To recreate this look, first place a photo on the background of your document. Add a white or colored gradient on either edge of your document. This technique will still let your image shine but will ensure the text on your image is readable. Using a gradient creates a seamless transition that is really fun to work with!
Blog Featured Image Layout #2
To achieve this look, simply place a photo on the background of your document. Then, place a horizontal bar on your photo. You can use one of your brand colors, or a color from your image. Play around with the transparency of the colored bar until you are happy with the result. In this example, the opacity is set to 70%.
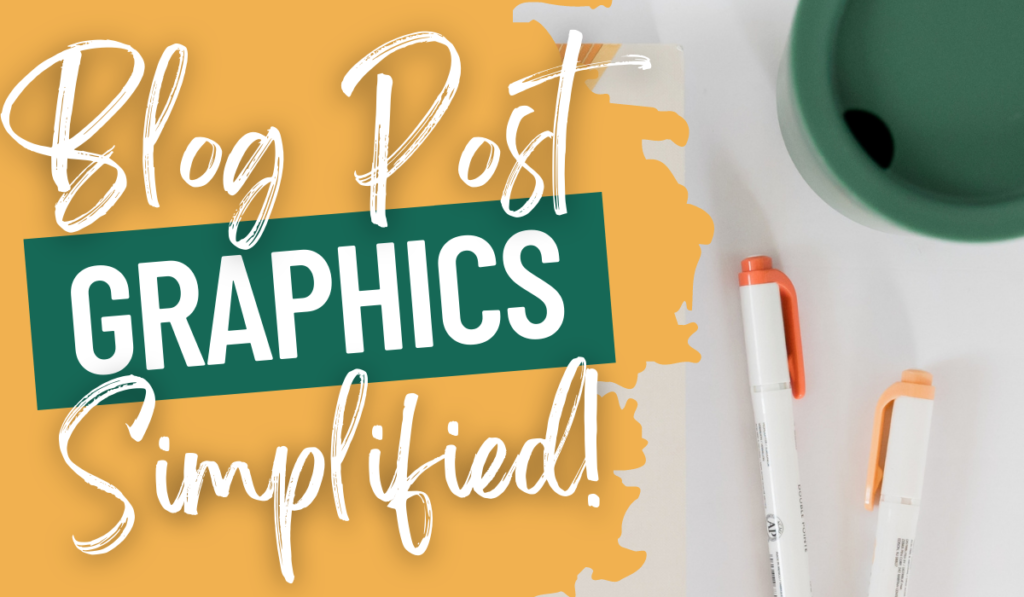
Blog Featured Image Layout #3
In this example, I’ve used a fun organic shape (but you can use any shape!) as a background for some big attention-grabbing text. the image used has some natural white space on the left side, which makes for a perfect area for some text! When looking for photos to use, always think about how you will incorporate the text.
To make the text pop, even more, I used the lift feature in Canva and added a block of color behind the word “graphcis”. I love how this turned out!
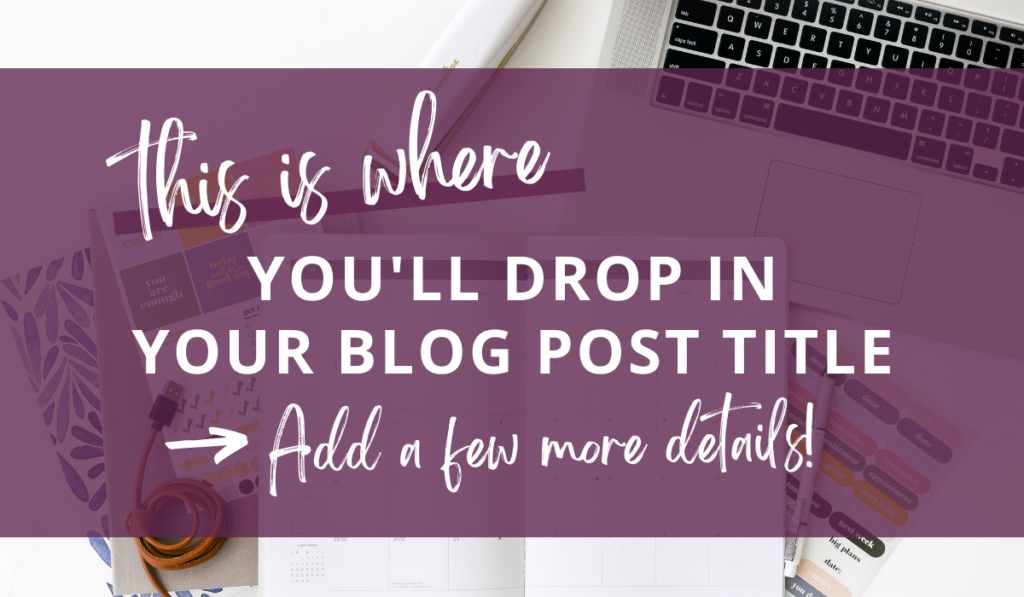
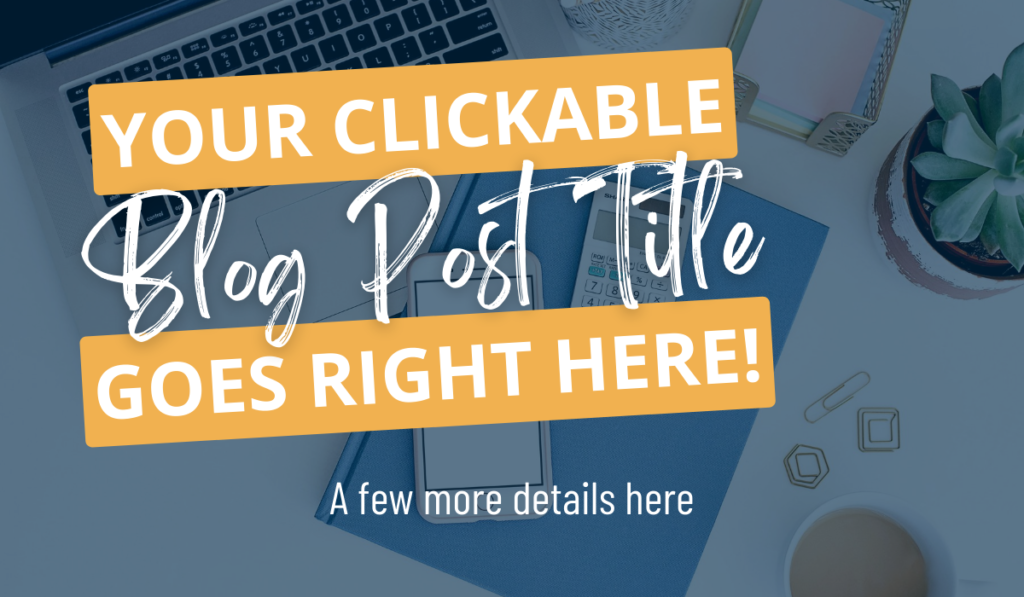
Blog Featured Image Layout #4
This is a super simple layout, and it will work with just about any photo! All you have to do is add your photo to the canvas and then add a rectangle on top of your image. You’ll want to use one of your brand colors. Then, drop the transparency a bit so the image begins to show through. Then add your text on top! It’s important to make sure that your text is readable on the background color. In this example, I’ve added some blocks of color and tilted the text to improve readability and add some interest.
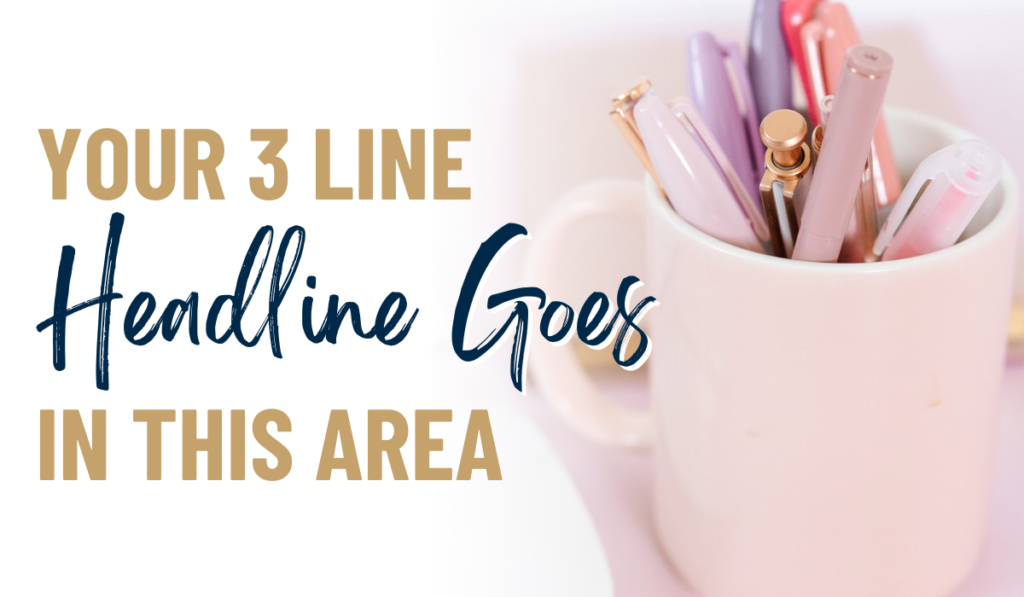
Blog Featured Image Layout #5
This next example works really well if you are using an image that has a white or light simple background. To achieve this look, you can add a white gradient on top of your background image to create a perfect area for your post title or other text. You can get creative with your type and change the colors, fonts, and sizing to make it more interesting with visual hierarchy.
Tips for Designing Featured Images
Utilize pre-designed templates!
Using templates is the best way to save yourself lots of time designing. Why start from scratch if you don’t have to?!
Use your brand fonts and colors!
It’s always a good idea to use your brand fonts and colors when you’re creating any graphics for your business. This creates consistency and will save you tons of time when designing.
Use high-quality images
I’m a sucker for styled stock photos, as I find them super easy to add text to and make my own. I use IvoryMix for just about all of my styled stock needs and it’s what I recommend to all of my students! Here are 500 free stock photos you can download and use in your own featured images.
You can also find some really good free images on websites like unsplash or pixabay. (Those two are my favorites.)
Be choosy! Don’t settle the first photo that catches your eye. Try searching for different keywords until you find the perfect image that will emotionally connect with your viewer.
You don’t have to use the image as is, either. Can you zoom in on a coffee mug or a set of hands? Can you use the background of the photo for a texture somewhere else? Here are a bunch of creative design hacks you can do to any image you find.
How to Add a Featured Image to Your Blog Post
Adding a featured image to your blog post can be done in just a few steps. Once you have your image created head over to your blog post or page. While in the page editor of WordPress, you’ll see a sidebar along the right-hand side of the window. Scroll down and you’ll see the area where you can add your image.
Adding a featured image to your blog posts and pages is a step you don’t want to miss when publishing your blog articles and other content! This is the visual representation of your content and a chance to make a first good impression when your dream viewers stumble upon your content.
Bless you for this! What a fantastic resource for those of us who struggle in this area. I will be following these recommendations from now on!
Great! I can’t wait to see what you create! 🙂
Thank you for these wonderful ideas on how to make graphics for our blogs and Facebook! Your post is going to be a reference for me for months to come!
The one question I do have at this moment is regarding the first example where you show the photo that fades to a colour overlay. Did you use Photoshop to do that or is it possible to do it with Canva?
Sure thing, Debra! Thank you!
Unfortunately, I don’t believe that that effect is possible in Canva. I use InDesign.
mind-blowing kristin…!! This is a great article for me and those who wants to create graphics. 🙂
Thanks a lot…
Best Real Money Online Casinos
Looking for a trusted casino site is not always easy, particularly for US residents. There are countless gambling sites available, but not all of them are trustworthy. We compiled a selection of top-rated sites for safe and secure gambling.
For US-based gaming fans, finding a trustworthy gambling site is a top priority. The market is vast, but casinos online stands out due to its solid reputation. Gamblers usually want a mix of security and fun, which is exactly what a quality platform should provide.
The biggest draw of online gaming is the ability to play for significant payouts, best online real money casino gives access to numerous cash titles that reward instantly. Ensuring fast withdrawals is vital for a satisfying play, allowing players to concentrate on the thrill of the game rather than banking issues.
New members are always welcomed with attractive incentives to start their journey with an advantage. At casino app real money, there are match deposit deals designed to boost your first deposit. Taking advantage of these deals gives you extra ways to win big without risking too much of your own capital initially.
The selection of entertainment today is truly impressive, catering to all styles and desires. Whether you prefer hitting the slots or card games, best casino online real money covers all preferences. From traditional table games to progressive jackpots, the options are virtually endless.
Mobile progress permits players to enjoy the authentic casino atmosphere remotely, new online casinos includes a robust mobile platform accessible via all modern phones. It is simple to place bets via your mobile, ensuring the fun continues 24/7.
Protecting personal data is crucial when playing for real money betting over the internet, best real money online casino employs SSL protocols to protect all user details. Using a verified platform provides honest results, giving everyone confidence while they enjoy.
In summary, the world of virtual betting is a great source of entertainment for those who play responsibly, online casino real money us continues to be a favorite for players wanting premium features. Get started to experience the ultimate thrill and win big.
[url=https://ecofindustries.com/hello-world/#comment-60224]Real Money Casino Reviews f21vhn[/url] 75d5_36
https://xxxbold.com/wp-content/plugins/clean-tube-player/public/player-x.php?q=cG9zdF9pZD0xMzU5OSZ0eXBlPXZpZGVvJnRhZz0lM0N2aWRlbyUyMGNsYXNzJTNEJTIydmlkZW8tanMlMjB2anMtYmlnLXBsYXktY2VudGVyZWQlMjIlMjBjb250cm9scyUyMHByZWxvYWQlM0QlMjJhdXRvJTIyJTIwd2lkdGglM0QlMjI2NDAlMjIlMjBoZWlnaHQlM0QlMjIyNjQlMjIlMjBwb3N0ZXIlM0QlMjJodHRwcyUzQSUyRiUyRnh4eGJvbGQubGl2ZSUyRndwLWNvbnRlbnQlMkZ1cGxvYWRzJTJGMjAyMyUyRjA4JTJGU2FyYS1KYXktaXMtc3VjaC1taWxreS1ob3QtbWlsZi5qcGclMjIlM0UlM0Nzb3VyY2UlMjBzcmMlM0QlMjJodHRwcyUzQSUyRiUyRnZpZGVvcy54eHhib2xkMjUub25saW5lJTJGMjAyMyUyRjA4MjMlMkZTYXJhJTI1MjBKYXklMjUyMGlzJTI1MjBzdWNoJTI1MjBtaWxreSUyNTIwaG90JTI1MjBtaWxmJTI1MjB0aGF0JTI1MjBjcmF2ZXMubXA0JTIyJTIwdHlwZSUzRCUyMnZpZGVvJTJGbXA0JTIyJTIwJTJGJTNFJTNDJTJGdmlkZW8lM0U=
https://www.maintenancecprservices.com/2021/07/27/machine-installation-dubai/?unapproved=520332&moderation-hash=e7cb2c18f86c87ac598cf2f9c3550bf3#comment-520332
Real Money Casino Reviews
Finding a reliable place to gamble online can be challenging, particularly for US residents. The internet is full of different platforms, but quality varies significantly. We have prepared a list of the best options for exciting online entertainment.
For American players everywhere, locating a reliable casino platform is a top priority. The industry is huge, but best bitcoin casino stands out due to its proven track record. Players often seek a blend of safety and entertainment, which is exactly what a quality platform should offer.
A major benefit of internet betting is the opportunity to play for actual money, best online casinos real money provides numerous cash titles that reward instantly. Securing quick cashouts is crucial for a positive gaming session, allowing players to focus on the thrill of the game rather than banking issues.
Beginners are often greeted with attractive incentives to start their journey with an advantage. At casino online real money usa, you can find generous welcome packages designed to enhance your initial bankroll. Taking advantage of these deals gives you better opportunities to secure a profit without risking too much of your own capital initially.
The gaming library today is unmatched, serving all tastes and preferences. Whether you prefer spinning reels or card games, no deposit casinos covers all preferences. From traditional table games to progressive jackpots, there is something for everyone.
Innovation enables players to access the authentic casino atmosphere remotely, brand new online casinos usa supports a responsive design compatible with all smartphones and tablets. You can easily spin the reels directly from your smartphone, ensuring the fun continues 24/7.
Safety and security are paramount when engaging in real money betting over the internet, real cash casino games utilizes advanced encryption technology to secure all user details. Playing on a licensed site guarantees fair play and transparency, giving everyone peace of mind while they spin.
Ultimately, the world of virtual betting provides limitless fun for those who play smartly, casino live online continues to be a favorite for anyone looking for exceptional support. Join today to experience the ultimate thrill and enjoy the game.
[url=http://www.net-pier.biz/chao/notebook2/notebook2.cgi/jhYTEEOt]Real Money Casino Reviews l99esz[/url] 507f442
https://gastronomiaindustrial.com/component/k2/item/3-life-is-a-series-of-natural-changes/
https://dblinklightingsolutions.com/product/dblb22cx/?unapproved=201692&moderation-hash=044fcf887124cb48e0565b089b117e43#comment-201692