FREE AI BRANDING TRAINING On APril 29 - SAVE YOUR SEAT!
If your Canva account is a HOT MESS, then you are *without a doubt* spending way too much time creating graphics to market your business.
It’s really hard to even start designing and get into a groove when you can’t find anything in your Canva account. but it doesn’t have to be this way, I promise!
If you’re in a constant state of overwhelm every single time you open Canva, then stick with me because the tips that I’m about to share with you can change the way that you design for your business for good! All while giving your personal brand and confidence a little BOOST:)
If you don’t have Canva Pro yet, you can give it a whirl for free for 30 days with this link (affiliate link)
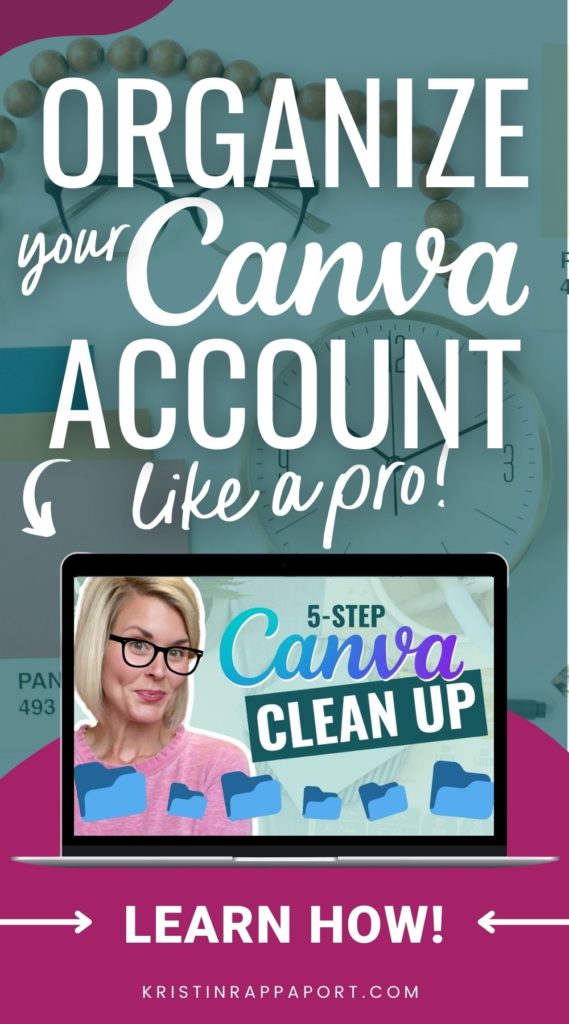
How to Organize Your Canva Account
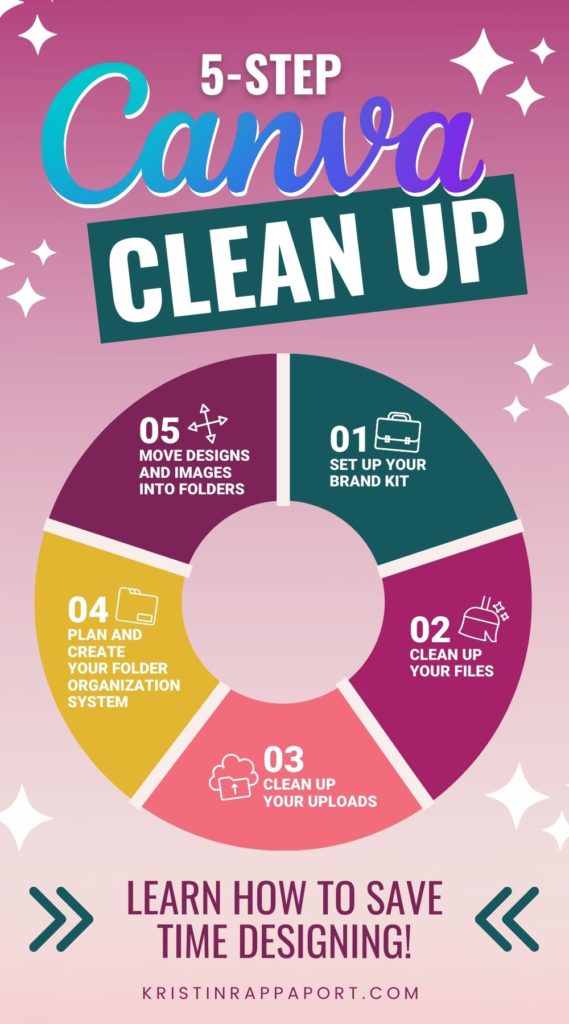
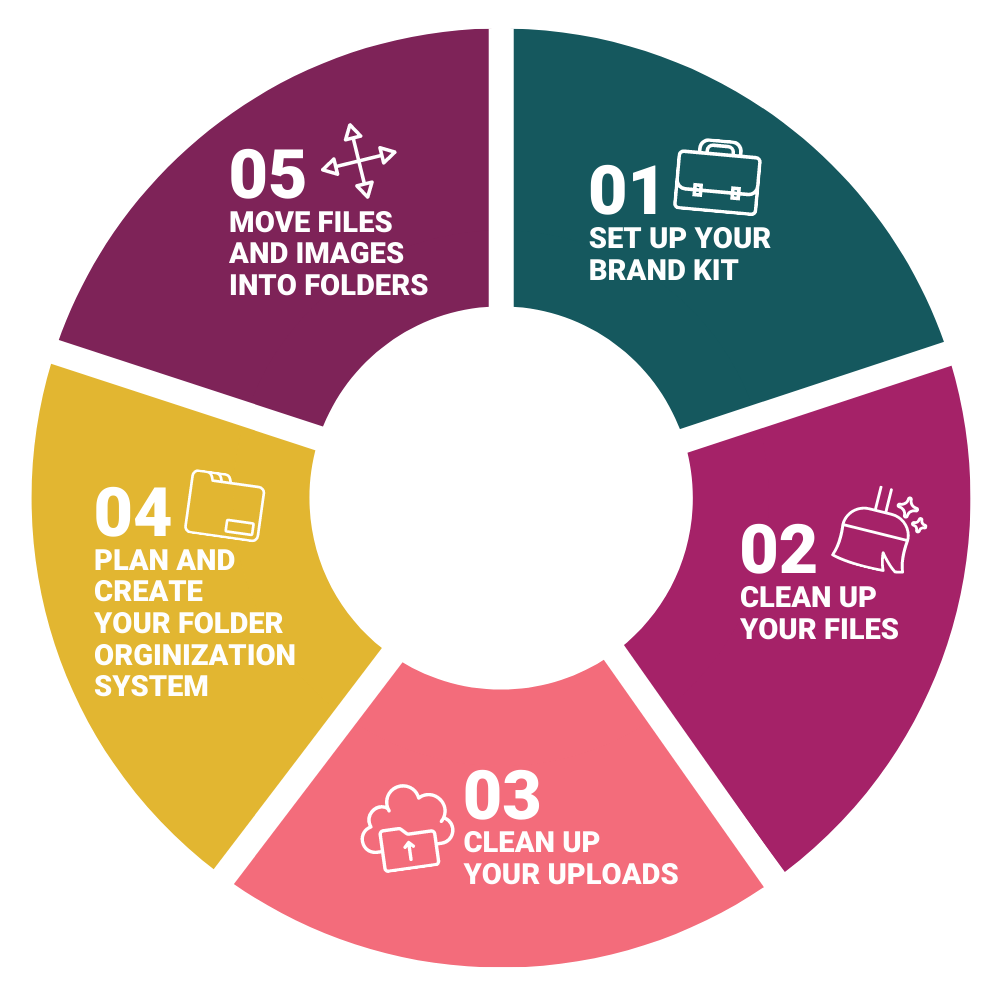
Cleaning up your Canva account will take a little bit of time, but will help banish the overwhelm you feel every time it’s time to design your next masterpiece! The process can be broken down into five easy-to-follow steps that will transform your HOT MESS Canva account into a workhorse for your business.
Before I dig into how to organize your Canva account – I have a HUGE tip to share with you. If you take just ONE thing from this tutorial, let it be THIS:
Avoid The Canva Home Screen!
The Canva home screen is very unorganized and incredibly overwhelming. When you first launch the app, you want to head straight to the “Your Projects” folder, which is a much more organized view of your designs, the images that you’ve uploaded, and all of the folders that you’ve created.
On this screen, you’re going to notice a section where you can click through tabs to see all of your folders, all of your images, and all of your videos. This is what you’re looking for:

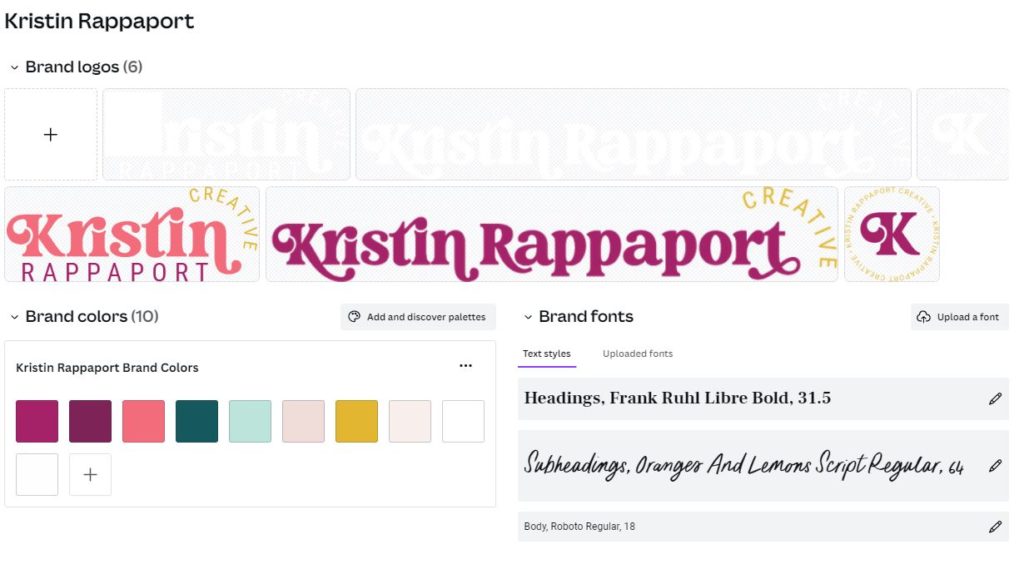
Set Up Your Brand Kit
With Canva Pro, you can set up your brand kit. You may be familiar with this but I can’t skip this important step.
- Upload all of your brand logos: usually a horizontal version, a stacked version, and then a sub mark or icon. It’s also a good idea to have a white version of each of these logos in case you need to place it on a dark background. (hello contrast!)
- Upload your brand colors: Click the “+” icon to add a new color, then drop in your hex code. Upload them in the order you want them displayed, as you can’t change the order later.
- Set your brand fonts: Set your headline font, subheadline (or accent) font, and your body copy font. Size doesn’t matter much here, because you’ll likely be changing the size of your fonts based on your graphic.
You can add multiple brand kits with Canva Pro, which makes client work or using Canva for two separate businesses a breeze!
Here’s a peek at my personal brand kit👇
Clean up Your Files
Delete files
If you’re anything like me, you probably have hundreds and hundreds of files in your Canva account – some of which you might not even use or need anymore. Head to the “Designs” tab from the “Your Projects” screen and you are going to see all of your designs in the order that you created them or last accessed them.
You can view them as a grid or view them as a list. Whatever is easier for you.
Starting at the bottom of the list, you can delete files that you no longer need or use.
Are you a file hoarder? Don’t worry… Your files will remain in the Canva trash for 30 days. (It’s more of a recycle bin!)
You can also select multiple files to delete in bulk.

Rename files
Once you’ve deleted the files you no longer use or need, rename them all appropriately to something that you might search for to find it. Yessss – all Canva designs are searchable! to rename a design, click the pencil icon and edit the name of the file.
Clean up Your Uploads/Images
Delete Images
Head to the “images” tab from the “Your Projects” screen and you are going to see all of the images that you’ve ever uploaded (that aren’t yet in a folder) in the order that you created them or last used them in a design.
This uploads section can be realllly long, depending on how long you’ve been using Canva, and if you do client work or not.
Just like you did in your designs folder, you can begin deleting images that you no longer use. Just click on the three little dots and then move to trash. You can also select multiple images to delete them in bulk.
NOTE: Be careful when you’re deleting images. If you delete an image that is currently used in a design, the image in the design will not show up. Instead, you will see a gray error box.
Rename images
Once you’ve deleted the images you no longer use or need, you can rename them all appropriately to something that you might search for to find it. This is sort of an optional step (and will depend on how organized you want your account to be, of course!) since once the images are in a folder, they are harder to search for. If you organize them right, you’ll be able to find whatever image it is you’re looking for quickly, regardless if it’s named properly.
HOLD UP! Free Design Training Alert!
If you’re itching to learn more about branding your business, designing amazing graphics to market your content and offers with a healthy dose of Canva know-how, tune into my free, on-demand graphic design training, Design Class 101: From Chaos to Canva Pro!
Alright…let’s get back to organizing:)
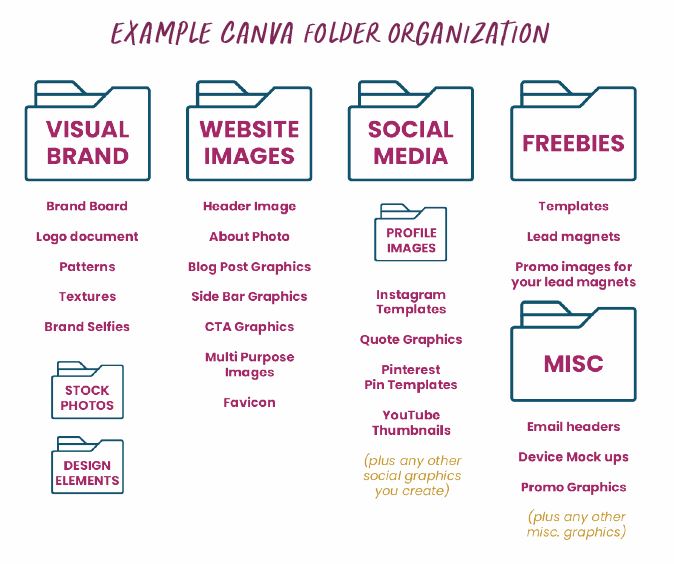
Plan and Create Your Folder System
With Canva Pro, you can have unlimited folders, and each folder can contain up to 200 items (designs, images, videos, and templates).
There’s no right or wrong way to create this folder system! You can organize your folders by product, by theme, or by project. You really just need to think about what is going to make the most sense for your brain and your business.
Some folder examples might be:
- Client work
- Lead magnets
- Social media graphics
- Digital products
- Brand elements
- Website graphics
You can even create sub folders inside of folders to keep yourself even more organized!
Organize it All!
Move your designs
Once you have your folder system built out, it’s time to move your designs and images into their homes. Starting at the bottom of your designs, begin moving them to their final destination. You can do this one by one, or in bulk.
Side note: I totally expect you to have to create more folders or sub folders as you start working your way through your designs!
Once you move a design into a folder, it is removed from your master design list, making it easy to see what you have left to organize.
Move your images
After your designs are all moved, you can begin moving your images into their folders. Starting at the bottom, move all of your images into their appropriate folders, one by one or in bulk.
Just like the designs, any image that you put into a folder will no longer appear in your images list – so you’ll know exactly what images you have left to organize!
An Organized Canva Account Makes Designing for Your Business Easier and Faster!
There are so many things you need to learn in order to design for your business, but it really does start at the foundation of organizing your Canva account! If you wanna become a total Canva pro, then be sure to sign up for my FREE on-demand design training, Design Class 101: From Chaos to Canva Pro, where you’re going to learn how to take total control of your brand, your graphics, and your Canva design workflow!
Liked this post? Share the love and pin your favorite image for later!